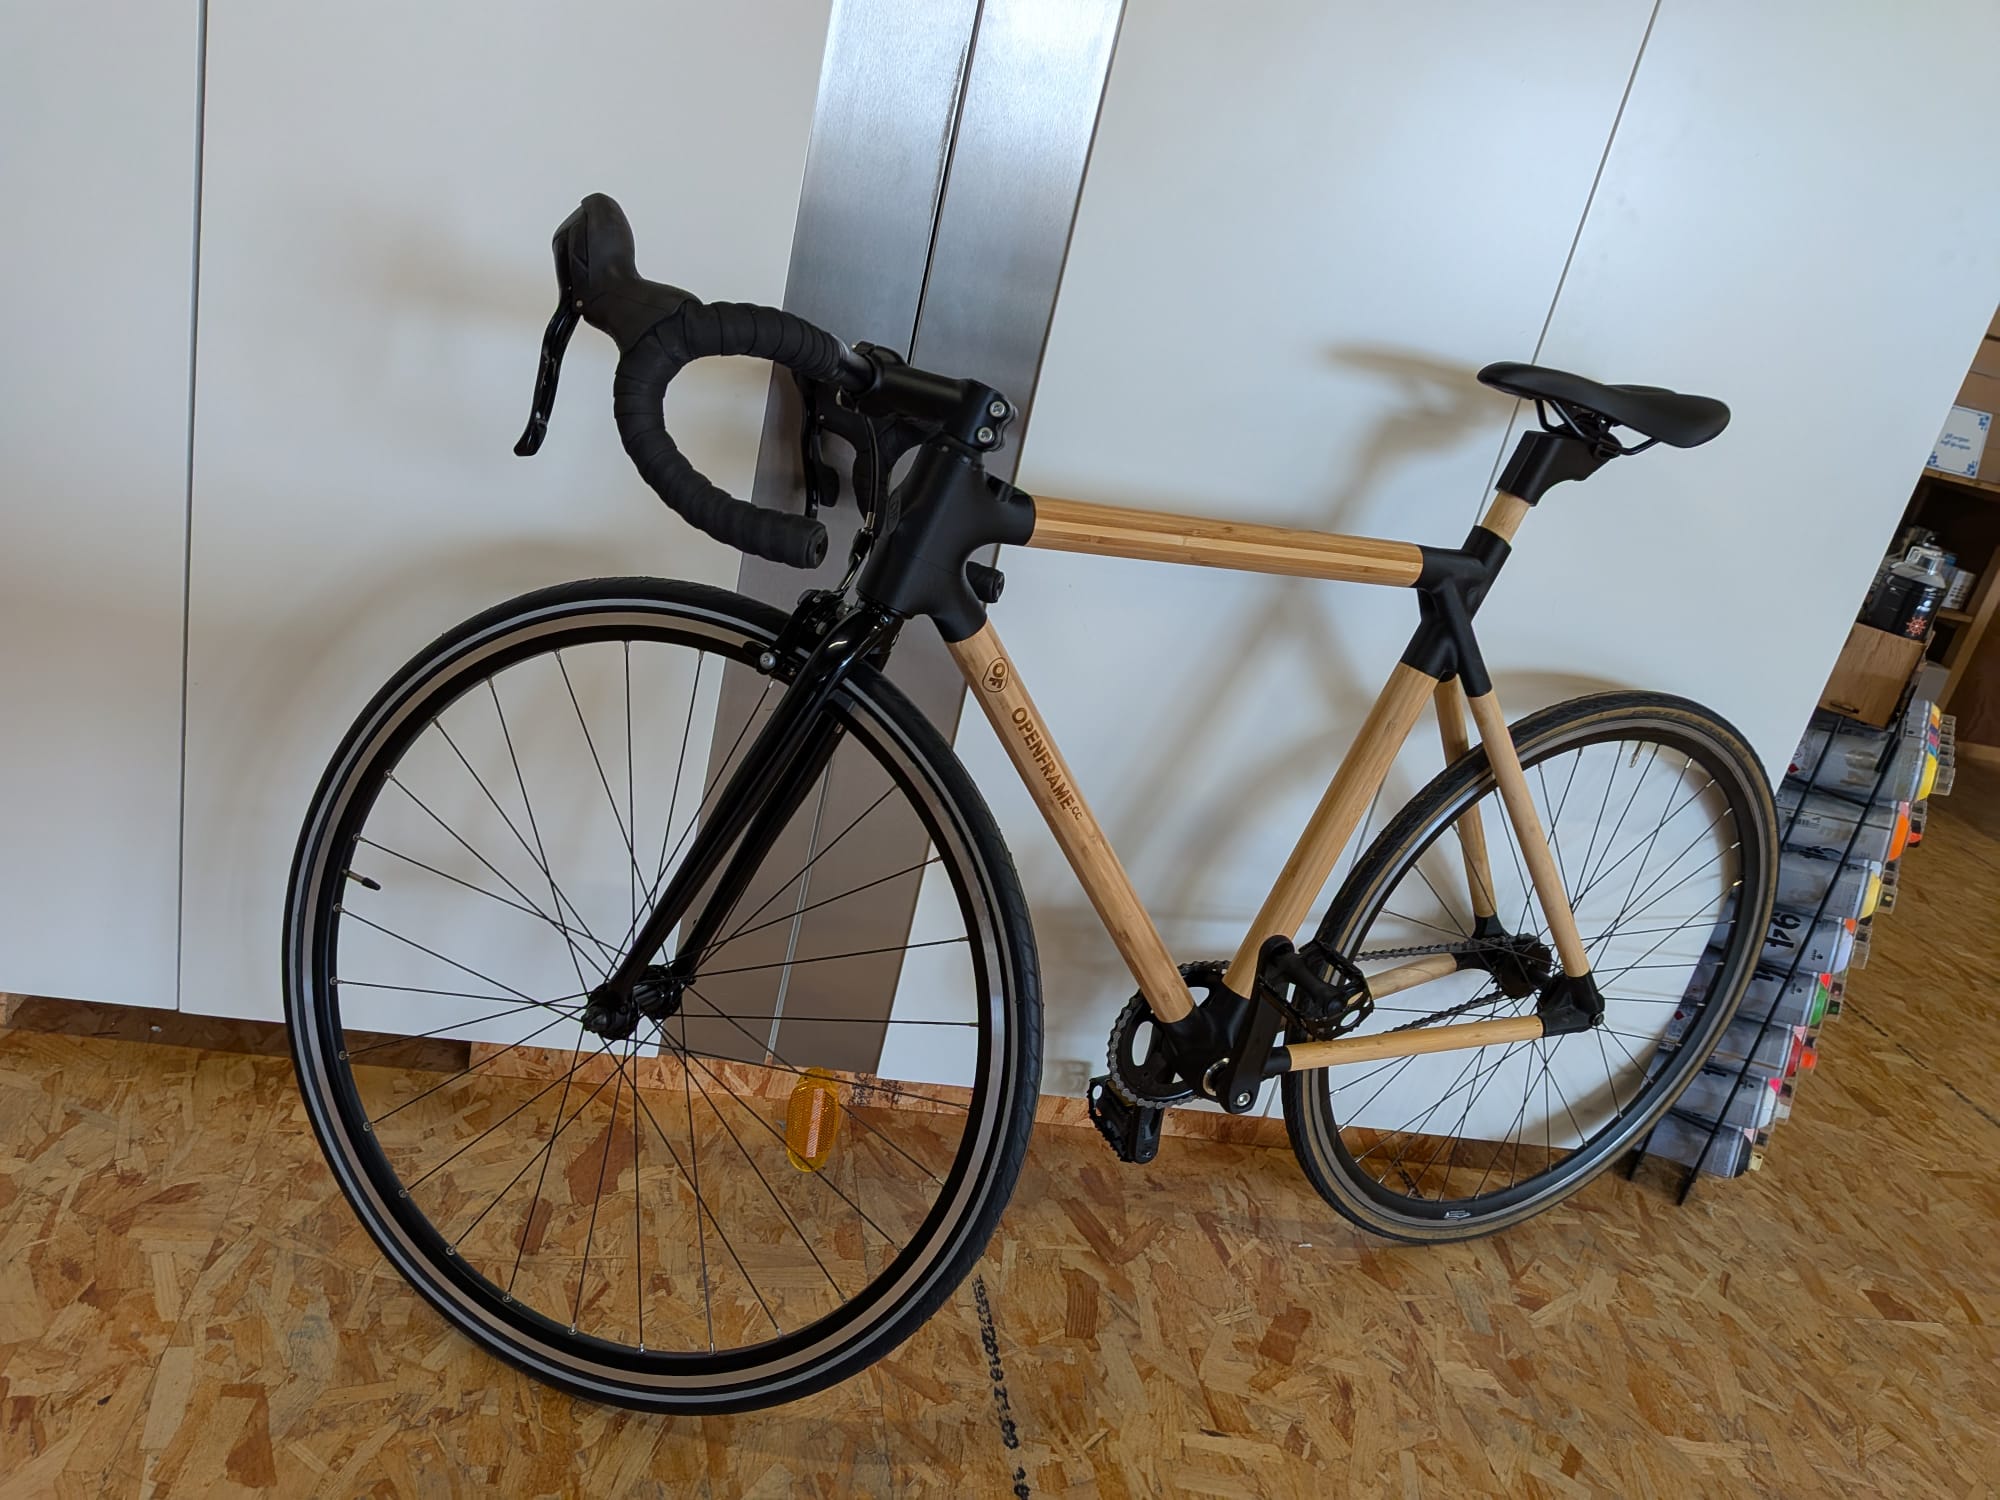
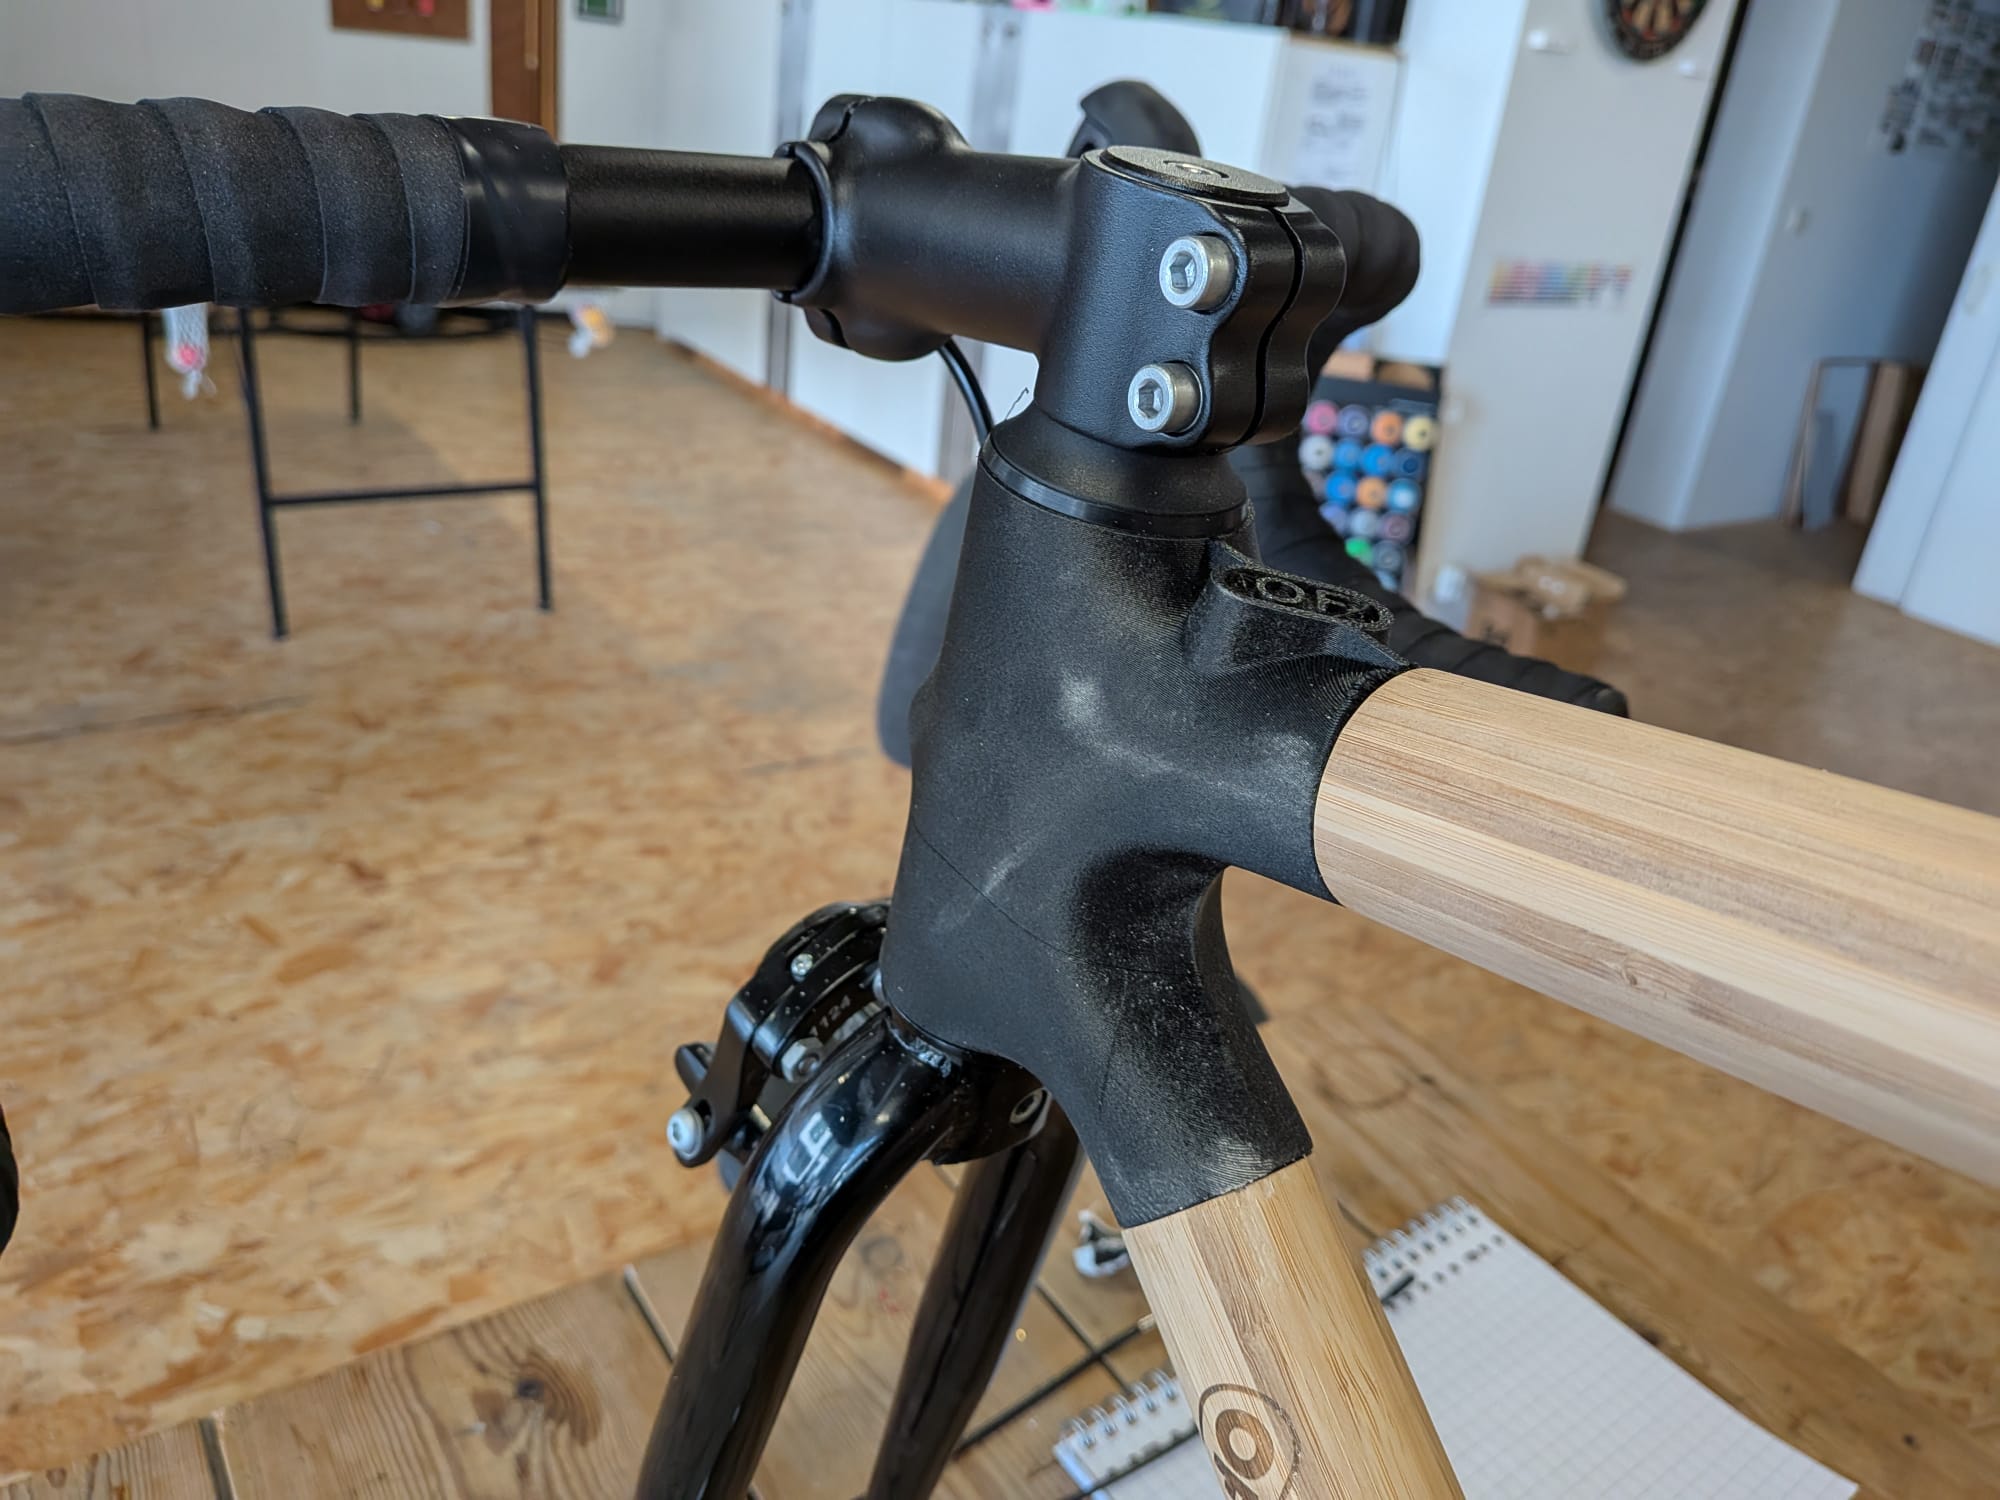
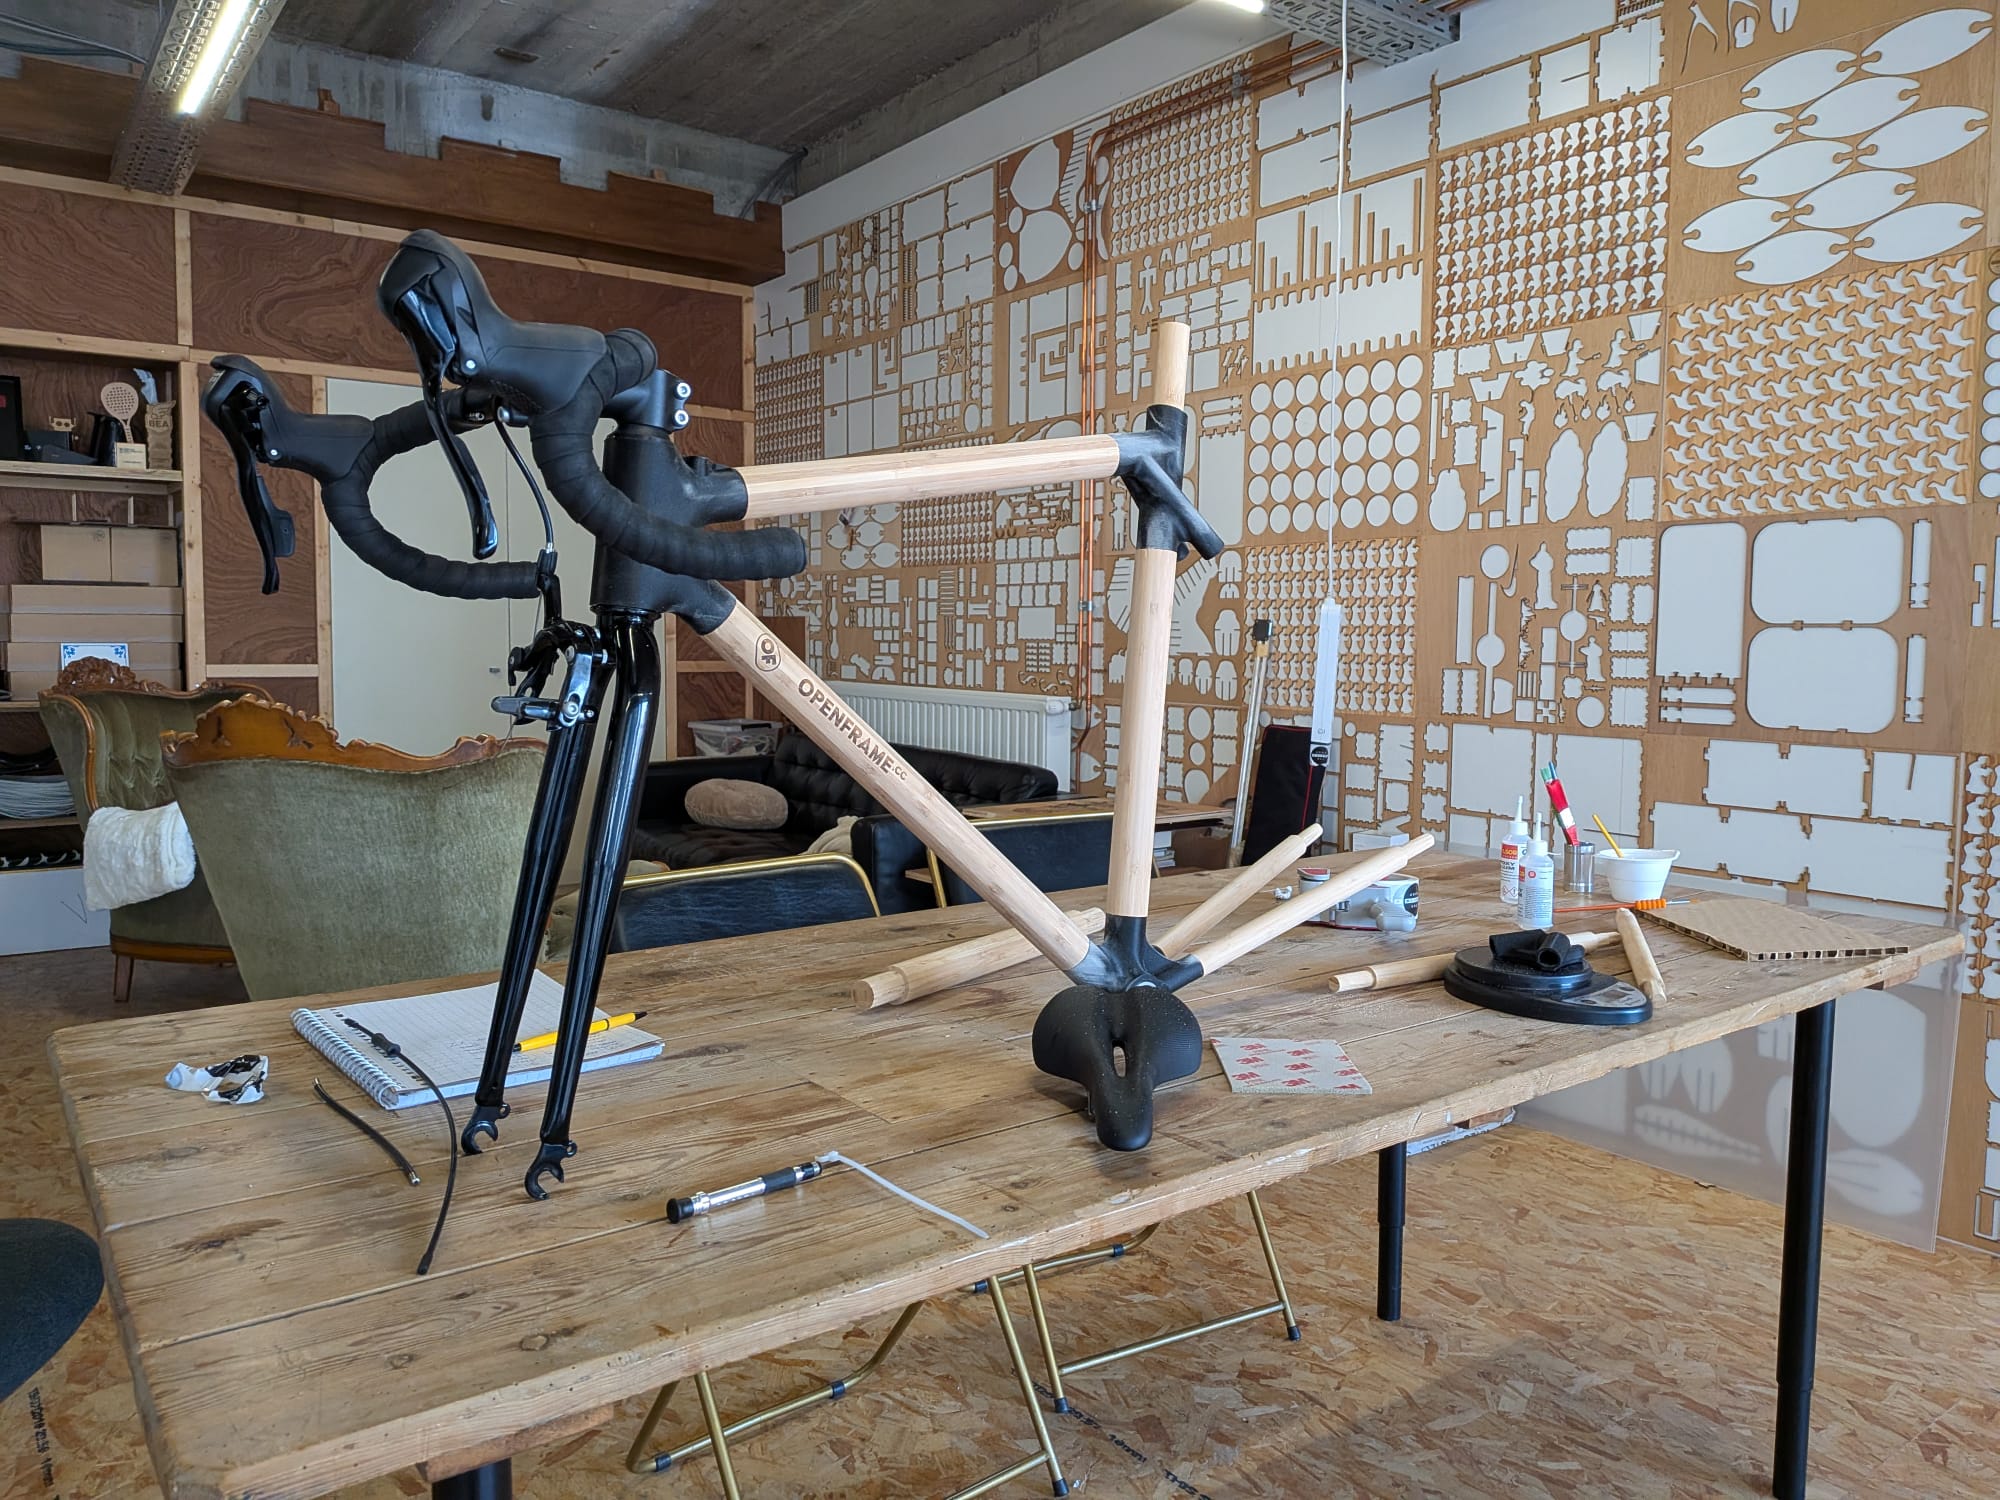
It’s been a while since I last wrote an update. I kind of lost track of the devlog for a bit, but the good news is that I now have plenty to talk about. Last week was mostly about research and printing. I redesigned the head lug using surface modeling, which not only calculates faster but is also far smoother to work with. I’ll probably look into adding this method to the WebGL configurator at some point, but that’s something for a later chapter, which, for now, feels a bit far away. This week, I printed all the parts and everything is now ready for assembly. I also spent quite a bit of time on social media. Ever since creating openframe.cc, I slipped into a bit of a doomscrolling phase. Still, I don’t really consider it wasted time. On the contrary — I came across a ton of inspiring content, from branding and marketing ideas to video editing tricks, bike projects, and 3D printing innovations. There are so many creative people out there; it’s truly impressive. With all the parts printed, the wood cut to length, everything gathered in the workshop, the right epoxy on hand, and the downtube already laser-branded, there’s really no excuse left not to assemble the bike. Before doing so, I brought my small scale to the workshop and found that the first frame version weighs less than 2.5 kg. That was a pleasant surprise. I also included the 51 grams of the FSA adapter, since the frame can’t really be used without it. Another nice discovery is that the total of all 3D-printed parts doesn’t even exceed a single spool of filament. Altogether, it’s about 686 grams, and if I add roughly 10% extra for skirts, brim, and support, which I try to avoid, the total comes to 754.6 grams. That means the weight is quite reasonable. I didn’t expect it to be much heavier, but it’s not ultralight either.
Parts
| Part | Material | Weight (g) |
|---|---|---|
| FSA-adapter | Aluminium | 51 |
| Bottom Bracket | 3D-print (PA12-CF) | 170 |
| Seat Lug | 3D-print (PA12-CF) | 162 |
| Head Lug | 3D-print (PA12-CF) | 236 |
| Dropout (Links) | 3D-print (PA12-CF) | 59 |
| Dropout (Rechts) | 3D-print (PA12-CF) | 59 |
| Down Tube | Bamboo | 418 |
| Head Tube | Bamboe | 351 |
| Seat Tube | Bamboe | 385 |
| Chain Stay (Links) | Bamboe | 110 |
| Chain Stay (Rechts) | Bamboe | 110 |
| Seat Stay | Bamboe | 150 |
| Seat Stay | Bamboe | 150 |
Totals
| Categorie | Totaalgewicht (g) |
|---|---|
| 3D-geprinte onderdelen | 686 g |
| Bamboe-onderdelen | 1674 g |
| Aluminium-onderdelen | 51 g |
| Totaalgewicht | 2411 g |
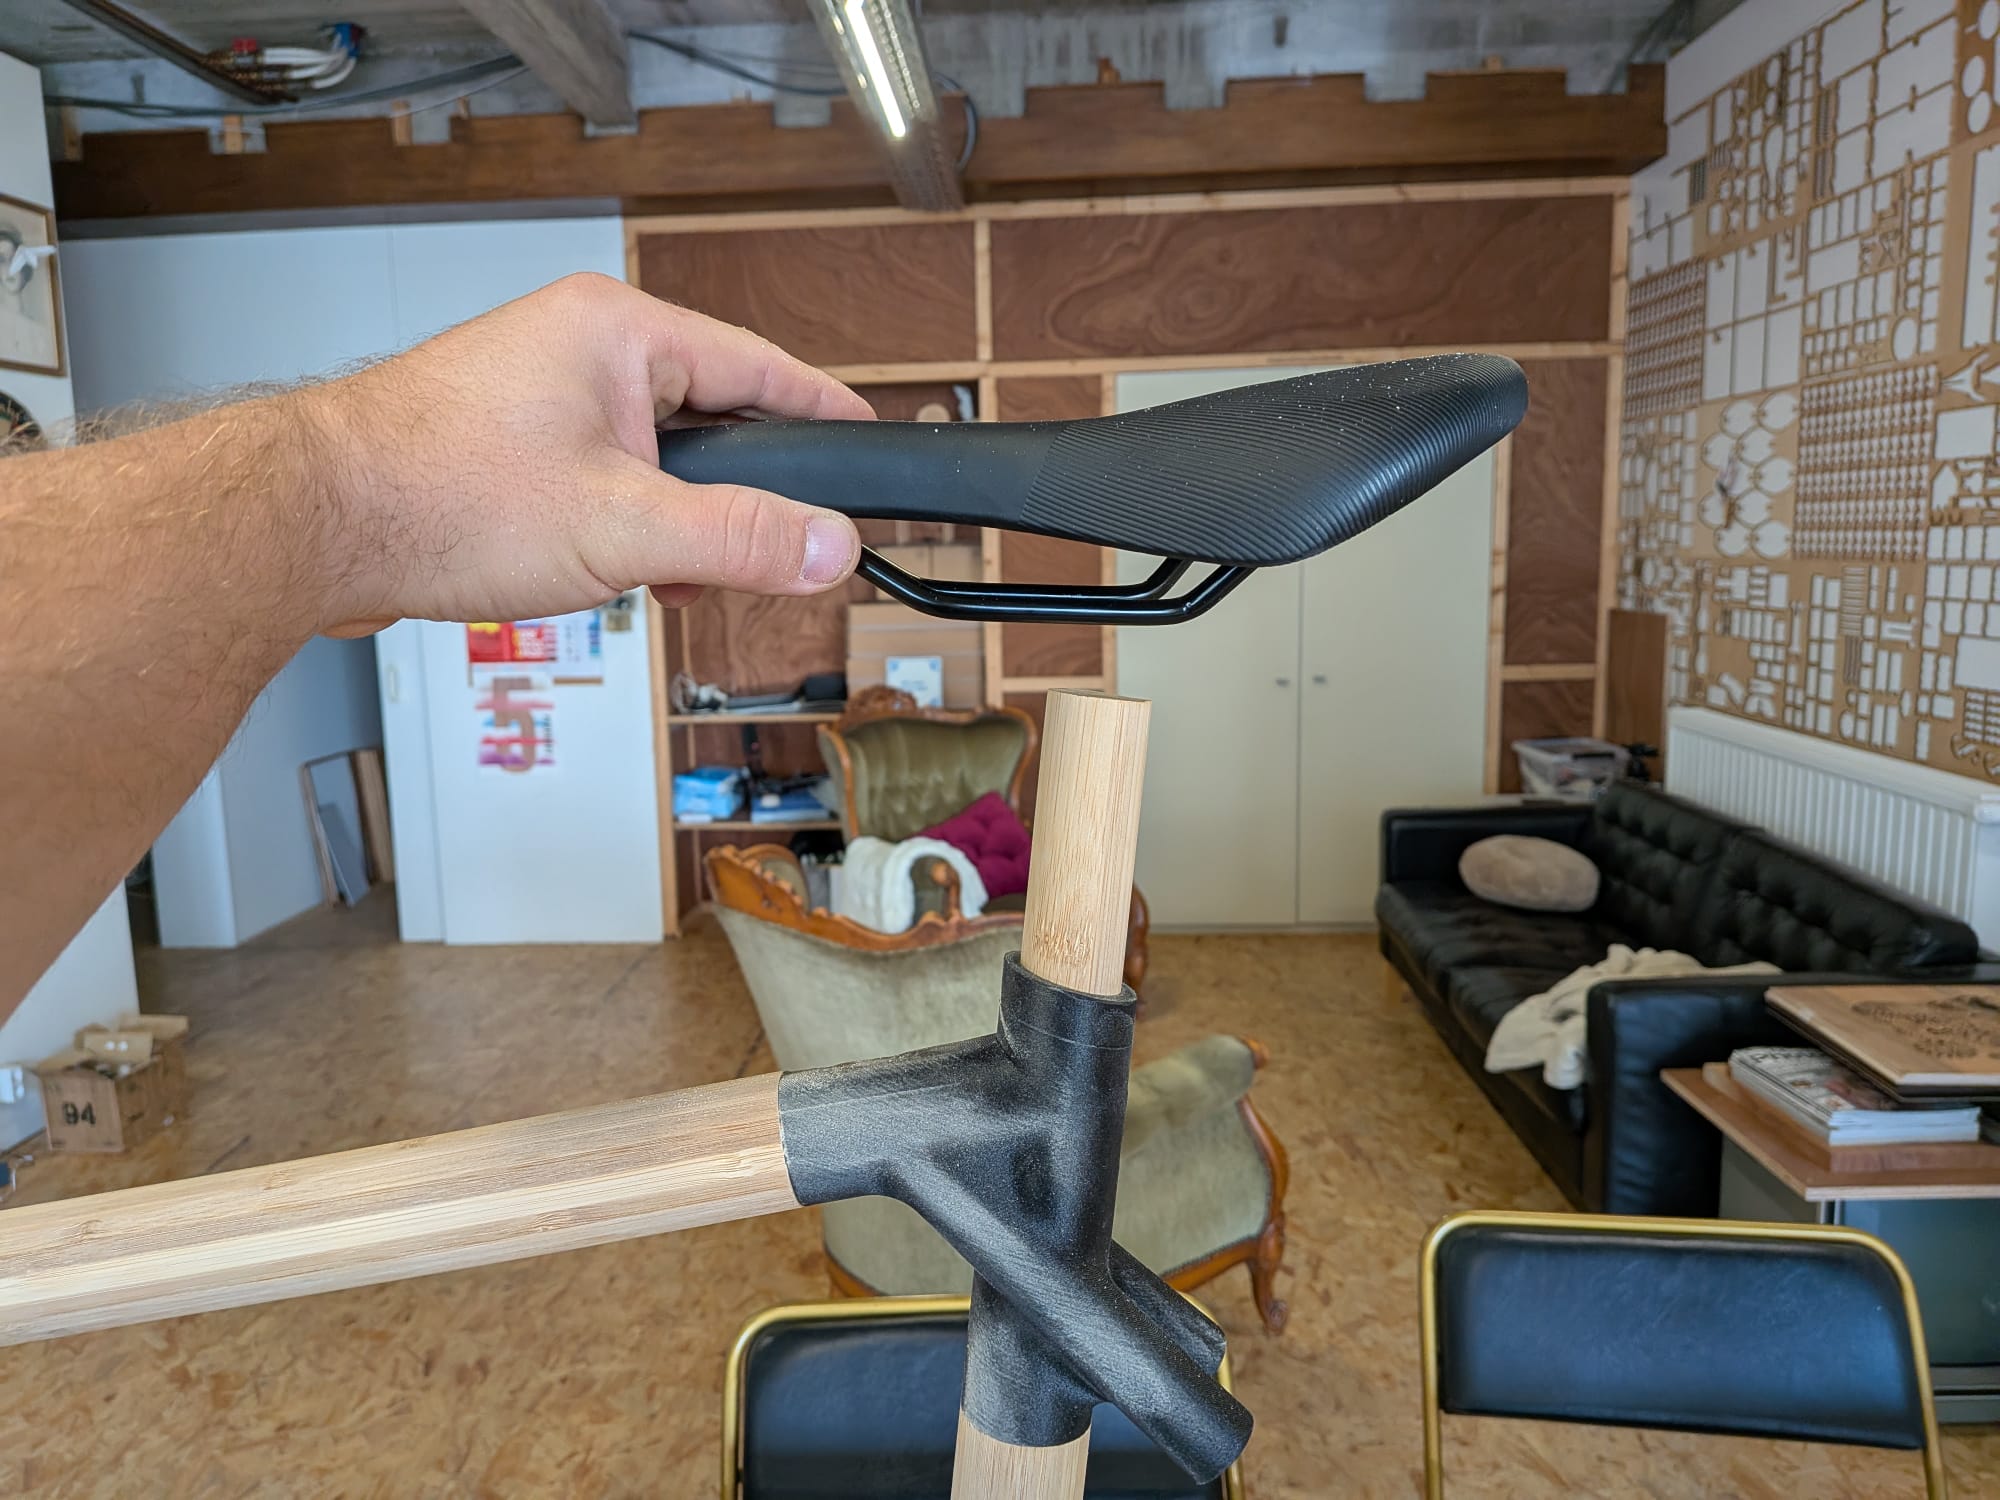
During assembly and testing, several points for improvement became clear. The rear wheel needs to be positioned slightly further back to keep the chain under proper tension. The seat lug will need a full redesign to achieve a better fit and more strength. The bottom bracket should be made sturdier, with thicker walls and a stronger connection to the tubes. The joints between the lugs and the bamboo tubes should go about ten millimeters deeper to increase the glue surface and improve the bond. The dropouts also need a more robust design to handle torsional and pulling forces better. Another area for improvement is the epoxy. I need to find a stronger resin with a precise mix ratio and a longer curing time to reach maximum strength. The tolerances between parts should also be smaller so everything fits tightly without forcing it. I want to test different filament types, such as PPA-CF or PAHT-CF, to see if they offer better stiffness or adhesion. The saddle should be redesigned and moved slightly forward for a more balanced seating position. The rear brake mount should be directly integrated into the frame design.
The bottom bracket also needs to be aligned precisely with the crank axis and given enough time to cure properly. And finally, I need to prepare better for epoxy work — brushes, cups, and a scale ready to go, with accurate measuring and thorough mixing. Fortunately, not everything needed fixing. Some things went really well. The chainline was tricky at first but ended up working perfectly. The handlebar adjustments gave the bike a much better posture and look. The bamboo tubes were the right length, though their outer diameters could be slightly tighter for a perfect fit. The print settings for PA12-CF were solid; I might just print a bit slower and hotter next time for better bonding. As for the material, PA12-CF feels a bit too flexible, so that’s worth exploring further — maybe by adjusting wall thickness, infill, or even testing an alternative material. For next week, the only clear task on the list is to order West System 105/206 epoxy.